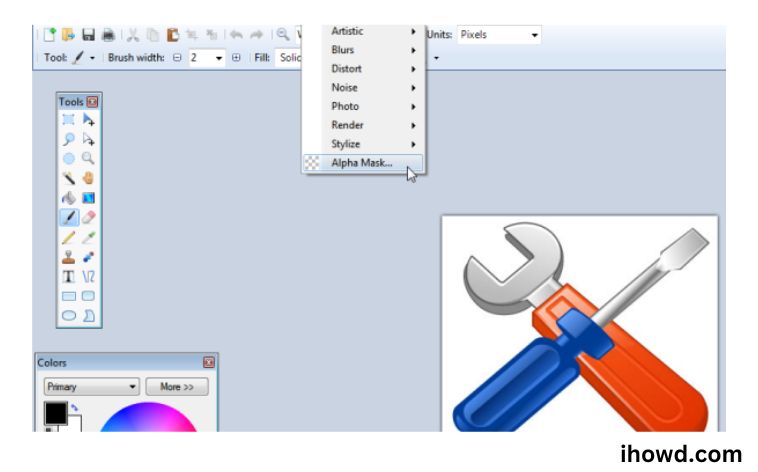
Transparent Background In Paint: Microsoft Paint is typically used for simple image editing tasks like cropping, rotating, and resizing. Occasionally, it’s even used to make brand-new drawings. Its user-friendly interface makes it the go-to programme for any straightforward editing work, and occasionally even for more difficult ones.
Users frequently prefer using images with transparent backgrounds. Transparent backgrounds make it simple to stack images on top of one another. In this situation, MS Paint’s Transparency option is effective. Although it can be used for small adjustments, the Transparency selection isn’t great for really high-quality images. With this feature, the user can pick a specific area of the image and a colour to make that colour transparent.
We’ll show you step-by-step how to use paint and paint 3d to create an image with a transparent background in this tutorial. Continue reading.
Describe Paint 3D.
You could consider it an updated version of Paint, but when the Creators Update was released, Microsoft also included the Paint 3D app. And as you are aware, pen input is also supported. Users can create objects, edit images, and create logos with the help of its many art tools. Any 2D object can be made into a 3D object using the tools in the Paint 3D application. Using Paint 3D, you can create any type of PNG image, including logos and transparent images. See the simple steps below for how to do this.
Why in Paint make a translucent background?
There are many reasons why people use transparent backgrounds in Paint, but the most popular one is to quickly create a logo that can be added to branded marketing materials. Businesses need logos that look good over a variety of colour prints. To get rid of any distracting aspects of an image, you could also want to make the backdrop transparent. For instance, you could wish to submit a headshot to a specialised job search website. You can make sure that prospective employers are drawn to your smile rather than being sidetracked by unimportant details by making the background transparent.
With Paint, how to create a transparent background

Here’s how to use Paint to make an image’s background transparent:
Launch Paint.
Now select the image you want to have the background removed from by clicking File > Open.
Once the image appears, select Transparent selection by clicking > Select.
Now choose the area item you want to “keep” using the > Free-form selection tool; the rest will become transparent.
The background of the image will now be transparent when you copy and paste it somewhere else.
In Paint 3d, how to Create a Transparent Background
The numerous editing tools and layering options are available to you if you want to use Paint 3D. There are ways to make portions of photos fully translucent, even if Paint doesn’t expressly give users the option to construct and manage 3D layers.
To get started, you must first choose the object from which you want to remove the backdrop. Transparency must then be added to the image after it has been saved with transparency. Do the following now:
Open your preferred image in the Paint 3D programme and select the canvas button. To ensure that any parts you crop out of the image are rendered transparent, select the Transparent Canvas option in the sidebar.
To isolate the precise area of your image that you want to make transparent, use the selection tool. Press the Ctrl + X key combination while the region is selected to take it out of the transparent state.
By saving a quasi-transparent file and viewing it alongside another image in Paint, the transparent portion of the image can be expanded. The image can then be modified with transparency as necessary to produce the desired result. In the end, this enables the creation of extremely complex image layers that are not conceivable without the use of transparency.
How to Use an Online Photo Editor to Create a Transparent Background
The image editor that comes with Windows is called Paint. Due to their relatively limited tool sets in comparison to other professional photo editors, most photographers definitely don’t utilise MS Paint or the new Paint 3D to edit images.
Here, we suggest using the online background remover from Fotor. It’s an excellent approach to take out portions of your photographs that you don’t want to utilise in other designs or themes. Based on potent AI technology, Fotor can instantly create photos with transparent backgrounds by erasing image backgrounds with a single click. Fotor can handle almost any form of image, including portraits, animals, vehicles, real estate, logos, and text. The process of manually creating clipping paths in Photoshop is no longer necessary.
The specific procedures to creating a transparent background in Fotor are as follows:
Upload your photo after opening the background removal tool on Fotor.
Within seconds, Fotor will automatically convert your image into a transparent PNG. Absolutely no manual editing is required!
To get your transparent PNG image in high quality, click the download icon. check more How to Remove Video Background Easily?
Conclusion
We discussed three efficient methods for creating transparent backdrops in this post, including Paint, Paint 3D, and the online picture editor Fotor. You may get the translucent backdrop image using the step-by-step instructions. I sincerely hope you find this video to be very useful.
Thank you for reading, and come back often to ihowd to find more useful content.
